There is a Japanese word, mono no aware — the bittersweet awareness of impermanence — that sits at the heart of kintsugi. When a cherished bowl cracks or a beloved mug shatters, our instinct is either to discard it or to glue it back together invisibly. Kintsugi offers a third path: repair it openly, with beauty.
The traditional method uses urushi lacquer, which is both an adhesive and a finish. Mixed with gold powder at the final stage, it creates those iconic gleaming seams. In this guide we cover both the traditional urushi method and a beginner-friendly modern epoxy approach, so you can choose based on your patience, budget, and access to materials.
Understanding the Two Methods
Traditional Urushi Kintsugi
Urushi is the sap of the Rhus verniciflua tree, and it has been used in Japanese lacquerware for over three thousand years. It cures in humid conditions, not dry ones, making it unique among adhesives. The full traditional process involves multiple layers over many weeks and requires care — urushi can cause an allergic skin reaction similar to poison ivy on first contact. Always wear gloves and work in a well-ventilated space.
Modern Epoxy Kintsugi
For most home makers, a high-quality two-part epoxy mixed with gold mica powder is an excellent starting point. The results are visually very similar, the process takes days rather than months, and the materials are inexpensive and widely available. This is the method we focus on in the step-by-step section below.

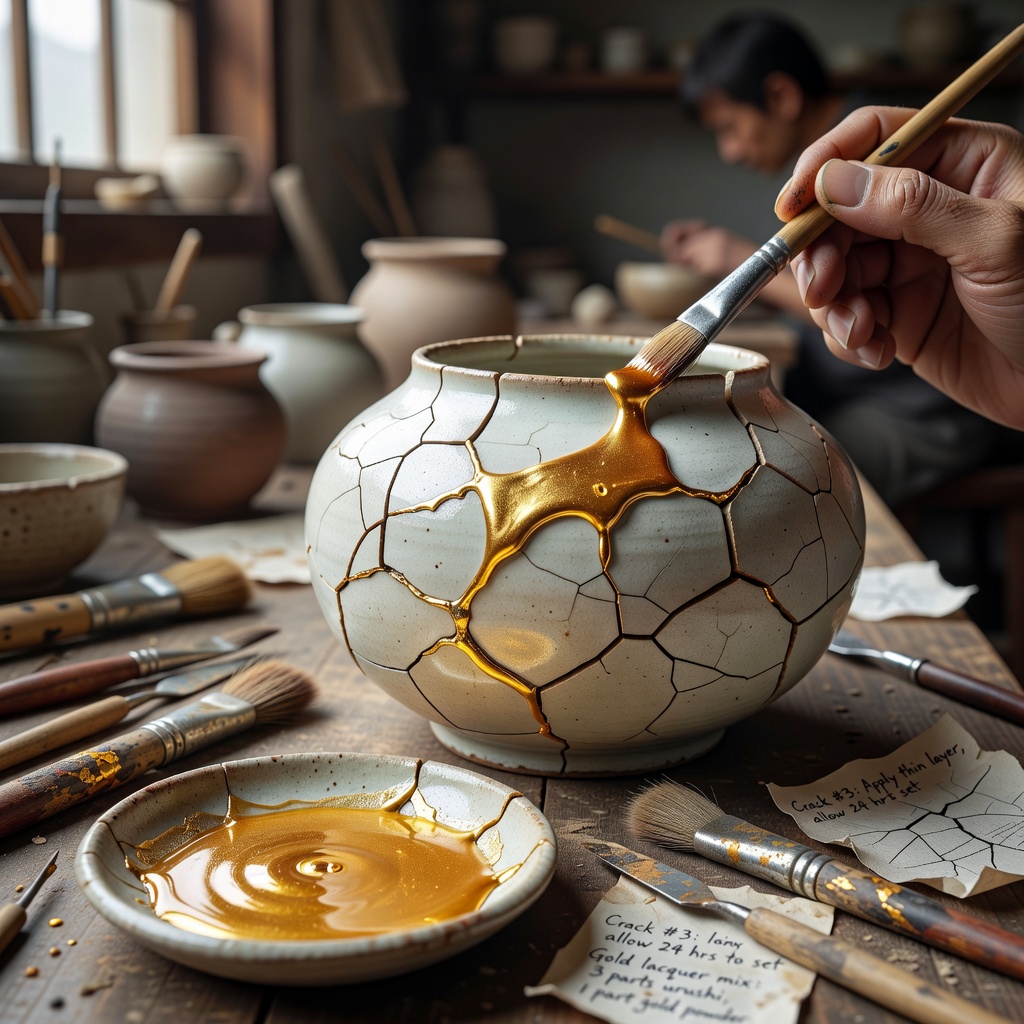
Step-by-Step: Epoxy Kintsugi for Beginners
Gather and Inspect Your Piece
Collect all the fragments of your broken ceramic. Wash them gently with mild soap, rinse thoroughly, and dry completely. Lay the pieces out on a flat surface and do a dry-fit test: see how the pieces come together before mixing any adhesive. Some repairs are straightforward; others require careful sequencing.
Mix Your Adhesive
Mix a small amount of two-part clear or amber epoxy according to the manufacturer's instructions — typically a 1:1 ratio. Add a generous pinch of gold mica powder (available at craft stores or online) and blend thoroughly until the colour is even. Work quickly: most epoxies have a 5–15 minute working time once mixed.
Apply and Join
Using a cocktail stick or a small brush, apply a thin, even layer of gold epoxy to one face of the break. Press the pieces together firmly and hold for 30–60 seconds. Use masking tape to secure the join while it sets if needed. Work on one join at a time, allowing each to firm up before moving to the next piece.
Let It Cure
Allow the repaired piece to cure undisturbed for a minimum of 24 hours, ideally 48. Place it somewhere stable and dust-free. Do not be tempted to test the joint early — epoxy continues to harden well past the point where it feels firm to the touch.
Sand and Refine the Seams
Once fully cured, any excess epoxy can be carefully trimmed with a scalpel or sanded back with 400-grit wet-and-dry sandpaper, used wet. Work gently and slowly — you are refining, not removing. Finish with 800-grit paper for a smoother surface.
Fill Gaps and Missing Chips
Where there are missing chips or larger gaps, fill with a fresh batch of gold epoxy built up in thin layers, allowing each to cure before applying the next. For very deep fills, use an epoxy filler (or wood filler coloured to match) as a base, then finish with the gold epoxy on top.
Final Polish
Using a small amount of Renaissance Wax or a dedicated metal polish on a cotton swab, gently buff the gold seams to a warm shine. Stand back and appreciate the web of gold lines that now trace your object's history. Every line tells a story.
What Pieces Work Best?
Almost any ceramic can be repaired with kintsugi — bowls, cups, plates, vases, teapots. The technique is particularly magical on objects with personal significance: a cup given by a loved one, a bowl bought on a memorable trip, a piece of family crockery. These are the objects whose repair is worth the time and care.
Very thin porcelain can be challenging because there is less surface area for the adhesive to grip. Thick stoneware and earthenware are the most forgiving and make ideal practice pieces.
After the Repair: Using Your Kintsugi Piece
Epoxy-repaired kintsugi pieces are generally suitable for room-temperature use but should not go in the microwave or dishwasher. Hand-wash gently in warm water. For decorative pieces or traditional urushi repairs, display proudly and wipe with a slightly damp cloth to clean. The gold lines will catch the light differently throughout the day — this is part of the pleasure of owning a kintsugi piece.
There is a reason kintsugi has endured for five centuries. In a culture that values new things above old, a visible, golden repair is an act of quiet resistance — and a beautiful one.